
Learn how to turn Google Sheets into a no-code autoposter with n8n to schedule, publish, and update posts on Twitter automatically.
If you’ve ever wished you could plan your social media content once and have it post automatically, this tutorial is for you. With n8n, you can turn a simple Google Sheet into a social media autopilot. You can schedule posts ahead of time and let n8n push them live on Twitter (X) without manual copy-paste or forgetting to post. In this guide, we’ll walk you through every step to launch your own posting workflow on Twitter (X).
What Is n8n?
n8n is an open-source automation platform that lets you connect numerous services from Google Sheets to social media APIs and build custom workflows without writing complex backend code. Think of it as your personal integration hub.
Some key features of n8n include:
- Over 500+ native integrations, so you rarely need to write custom API logic
- The ability to combine drag-and-drop nodes with custom code (JavaScript or expressions)
- Support for hosting on-premise or using a managed cloud service
- Built-in features for branching, looping, conditional logic, error handling, and reuse of workflows or subflows.
- Ability to incorporate AI or external API logic via HTTP Request / Function nodes
For this project, we’ll use n8n’s:
- Triggers to run the workflow on a schedule
- Google Sheets node to fetch upcoming posts
- Code node to pick the right post to send next.
- Twitter (X) node to publish automatically
You can expand this later to include Instagram, LinkedIn, or image generation tools.
Demo Overview: Social Media Post Automation with n8n
By the end of this tutorial, you’ll have a workflow that:
- Runs on a set schedule (say, every morning at 10 AM)
- Pulls content from a Google Sheet where you’ve drafted your posts
- Picks the next post marked as “Ready to Post
- Publishes it on your X(Twitter) account
- Updates the sheet to mark that post as “Posted”
Let’s dive in and start building our social media post automation.
Step 1: Set Up Your n8n Account
Start by signing up or logging in to the n8n platform. The platform offers a 14-day free trial with 1,000 workflow executions, giving you plenty of room to experiment.
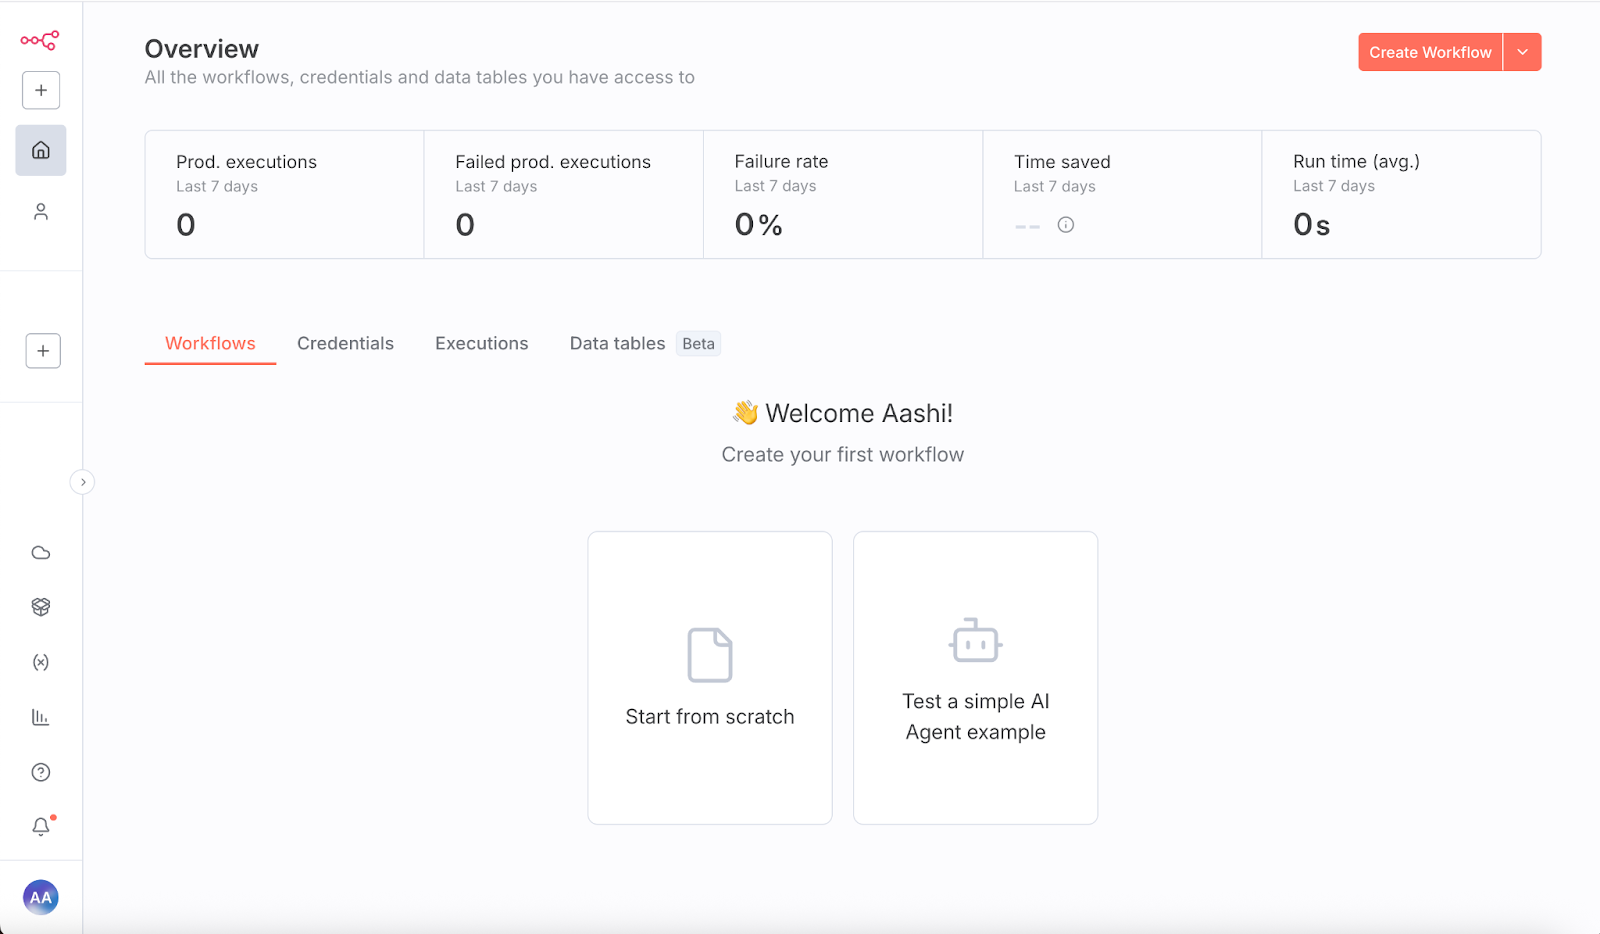
Once you’re in, create a new workflow from scratch. On the blank canvas, click the + button to add your first node and select On a schedule parameter to decide when your automation should run. You may choose triggers as per your requirement, for example, daily or weekly, depending on your posting needs.
Step 2: Add a Schedule Trigger
The schedule trigger acts like an alarm clock for your automation. Once it’s set, you won’t have to manually press “run” each time. It automatically signals n8n when to run your workflow.
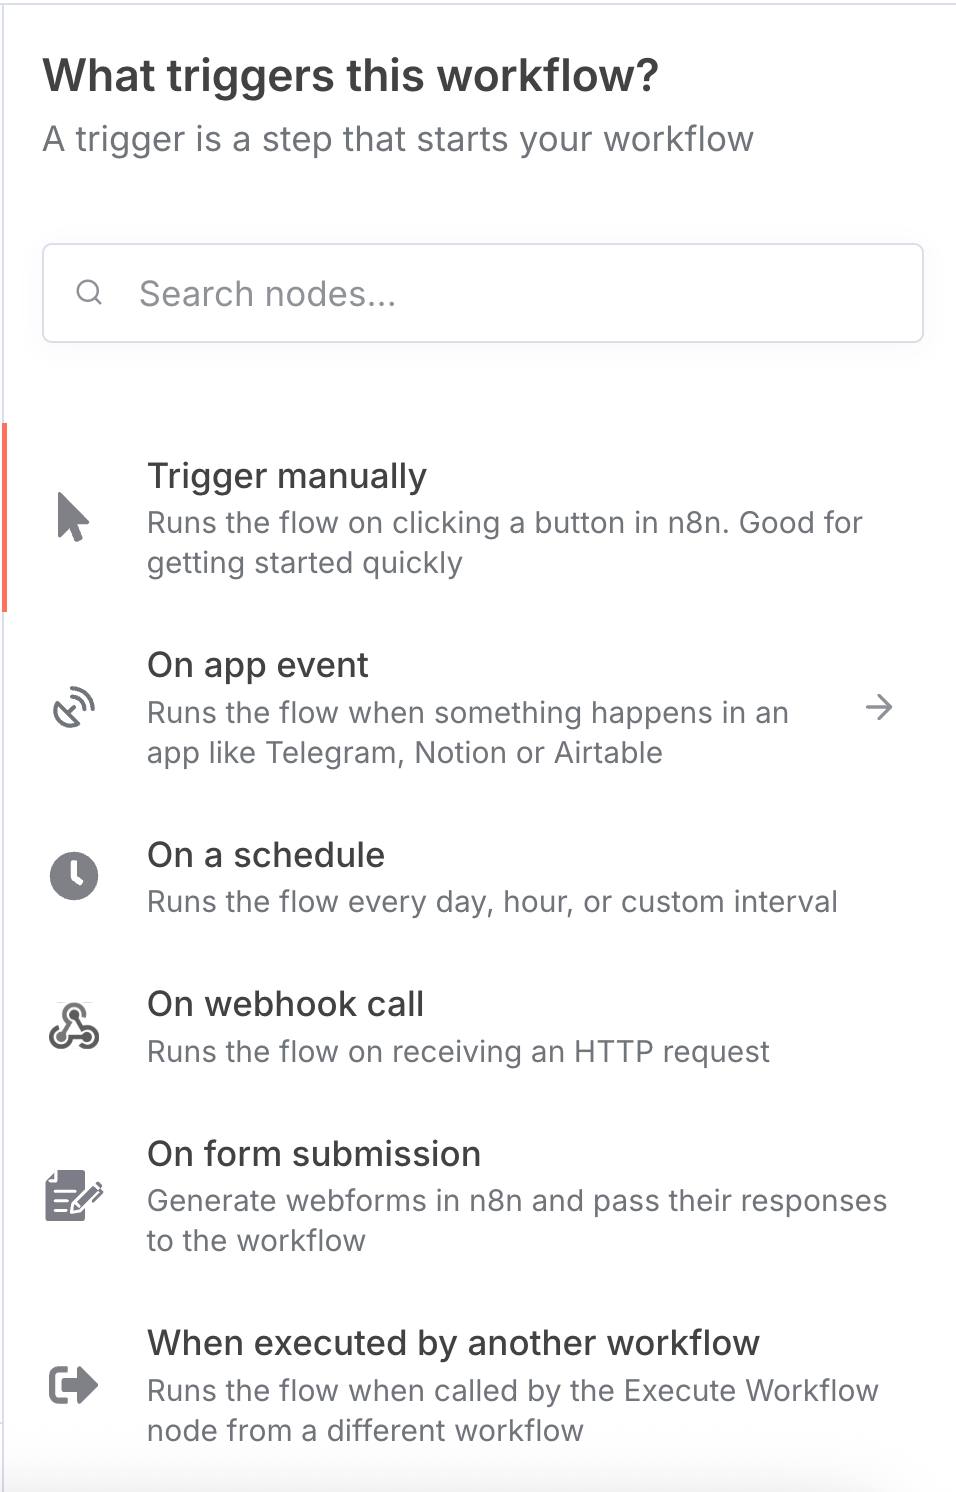
To set a Schedule Trigger:
- Click the + button and search for the schedule trigger node in the search bar.
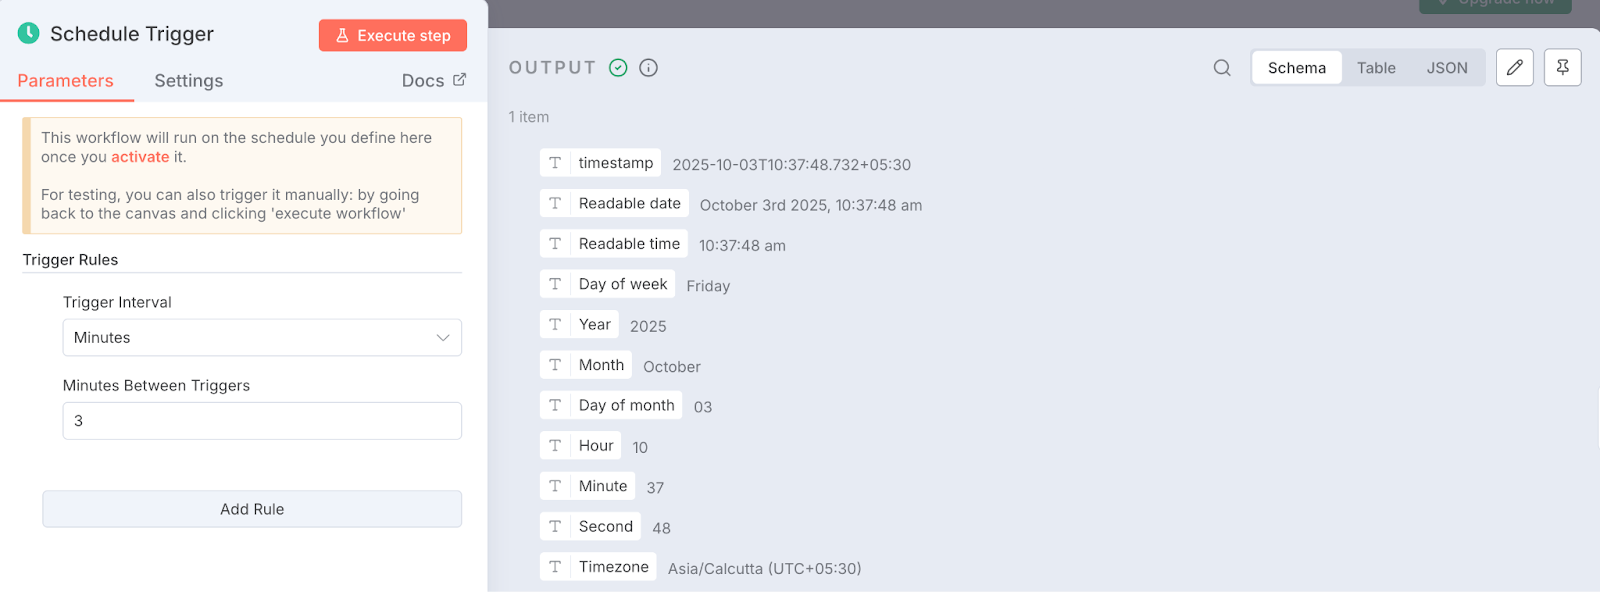
- Set the parameters as per your requirement. You can choose how often you want to post. In this example, we use 3 minutes as a trigger interval for testing purposes.
- Once all parameters are set, click Execute step to test the trigger. You’ll see the output appear on your canvas and know your schedule is active.
Now that our schedule trigger is ready, let’s connect it to Google Sheets so the workflow can pull the posts you’ve planned for your X (Twitter) account.
Step 3: Connect Google Sheets
Your schedule trigger knows when to run, but now it needs to know what to post. This is where Google Sheets comes in. We’ll use it as a simple content database to plan posts ahead and let n8n pick them up automatically.
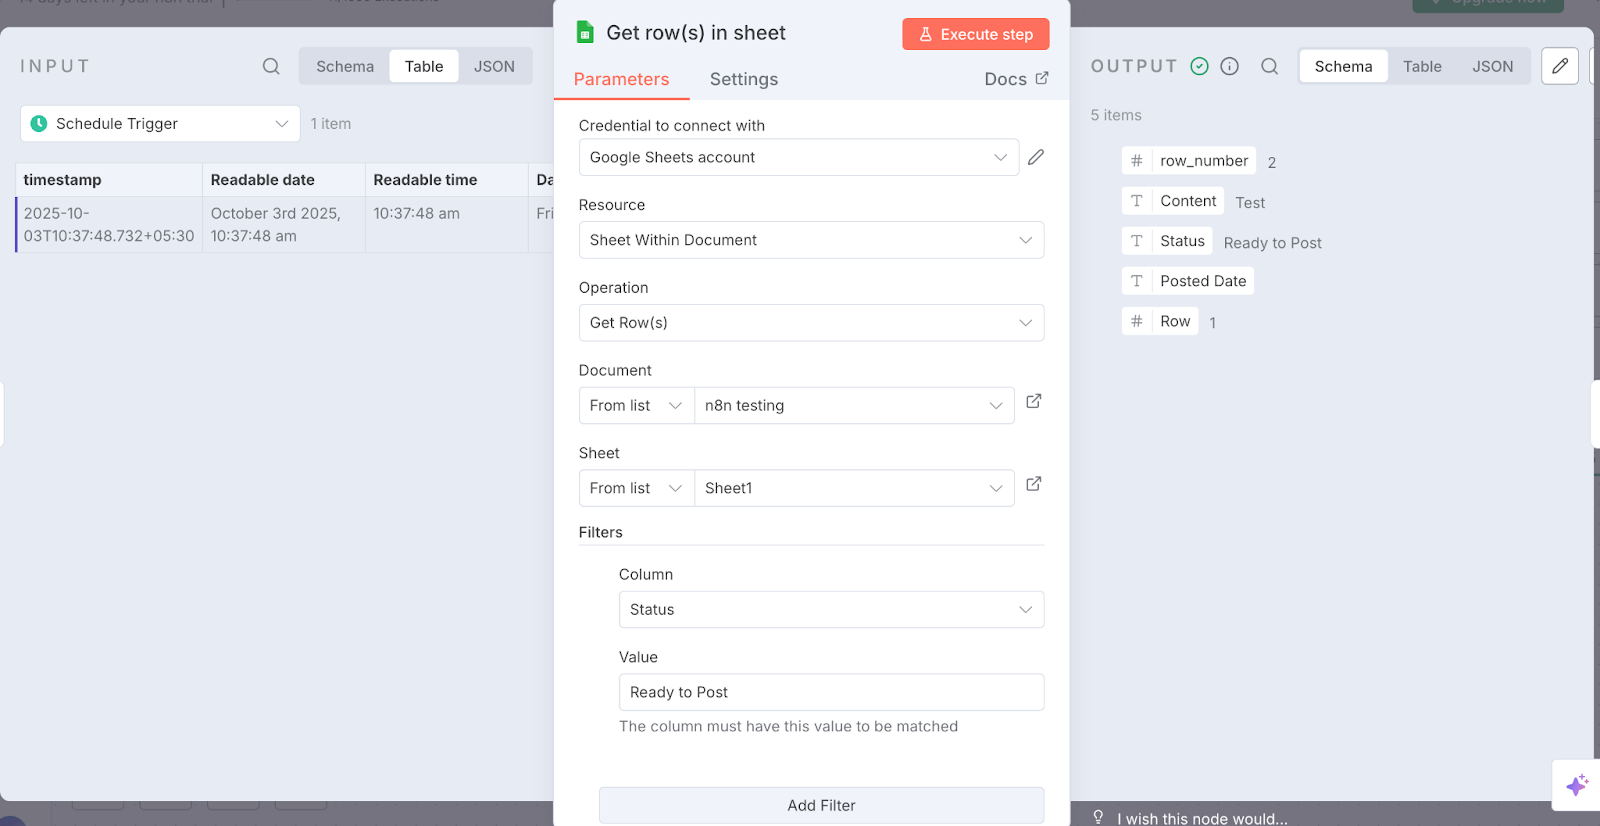
Once we have the content, next we set up a Google Sheets node as follows:
- Click the + button attached to the schedule trigger and search for the Google Sheets connector in the search bar.
- Search and select Google Sheets, and click on Get row(s) in sheet.
- Authenticate your Google account (n8n will walk you through the quick OAuth setup).
- Fill in the remaining parameters, such as the operation (Get Row(s)), the document to be accessed, and any necessary filters.
- Click Execute step to test the connection. You’ll see the input coming from the schedule trigger and the output from the Google Sheets node filled with the rows and details pulled directly from your sheet.
With your content successfully flowing into the workflow, the next step is to add a bit of logic so n8n knows which post to pick and send out first.
Step 4: Add a Function Node
Before we can publish, the workflow needs to know which post to send. Right now, all rows from Google Sheets are coming in, but we only want to push the next one marked “Ready to Post.” To set up this function, attach a new node as follows:
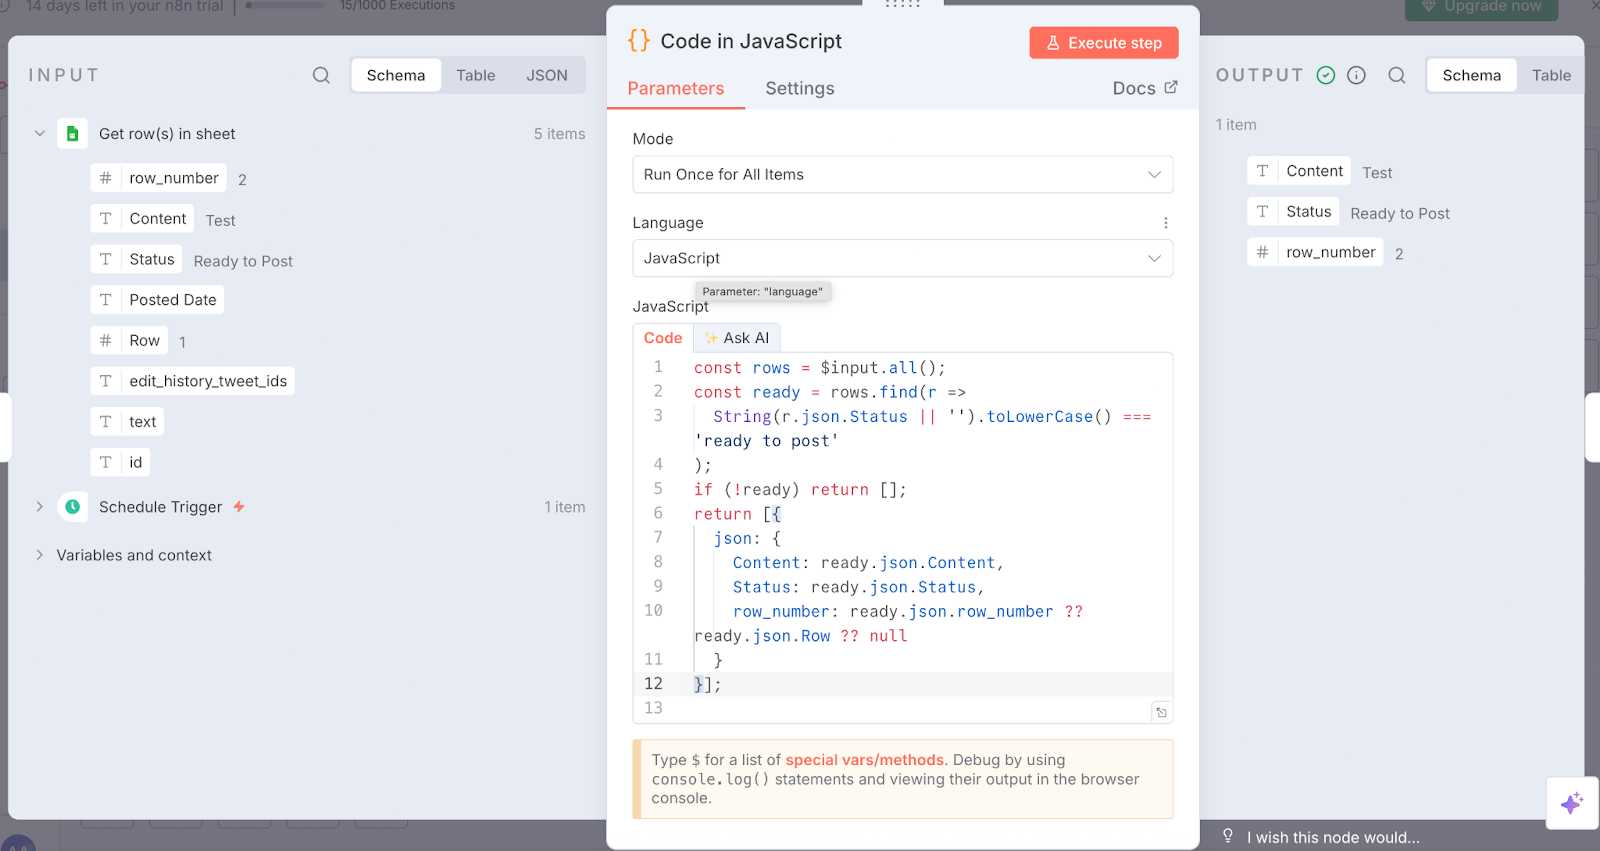
- Click the + button attached to the Sheets node and add a Function node (Code).
- (Optional) You can also use the AI Transform node if you’d like AI to help generate the code.
- Choose JavaScript as the language and paste the following snippet:
```javascript
const rows = $input.all();
const ready = rows.find(r =>
String(r.json.Status || '').toLowerCase() === 'ready to post'
);
if (!ready) return [];
return [{
json: {
Content: ready.json.Content,
Status: ready.json.Status,
row_number: ready.json.row_number ?? ready.json.Row ?? null
}
}];
```
This filters your sheet and passes forward only the first post marked “Ready to Post”.
- Click Execute step to test it, and you will see sheets and trigger input on one side and selected sheets output on the other side.
Now your workflow understands exactly which post to pick up next. In the next step, we’ll connect this filtered output to X(Twitter) so the selected content can be published automatically.
Step 5: Post to Twitter (X)
With the tweet-ready output from the previous step, you can now connect directly to your Twitter (X) account and push posts live without touching the app.
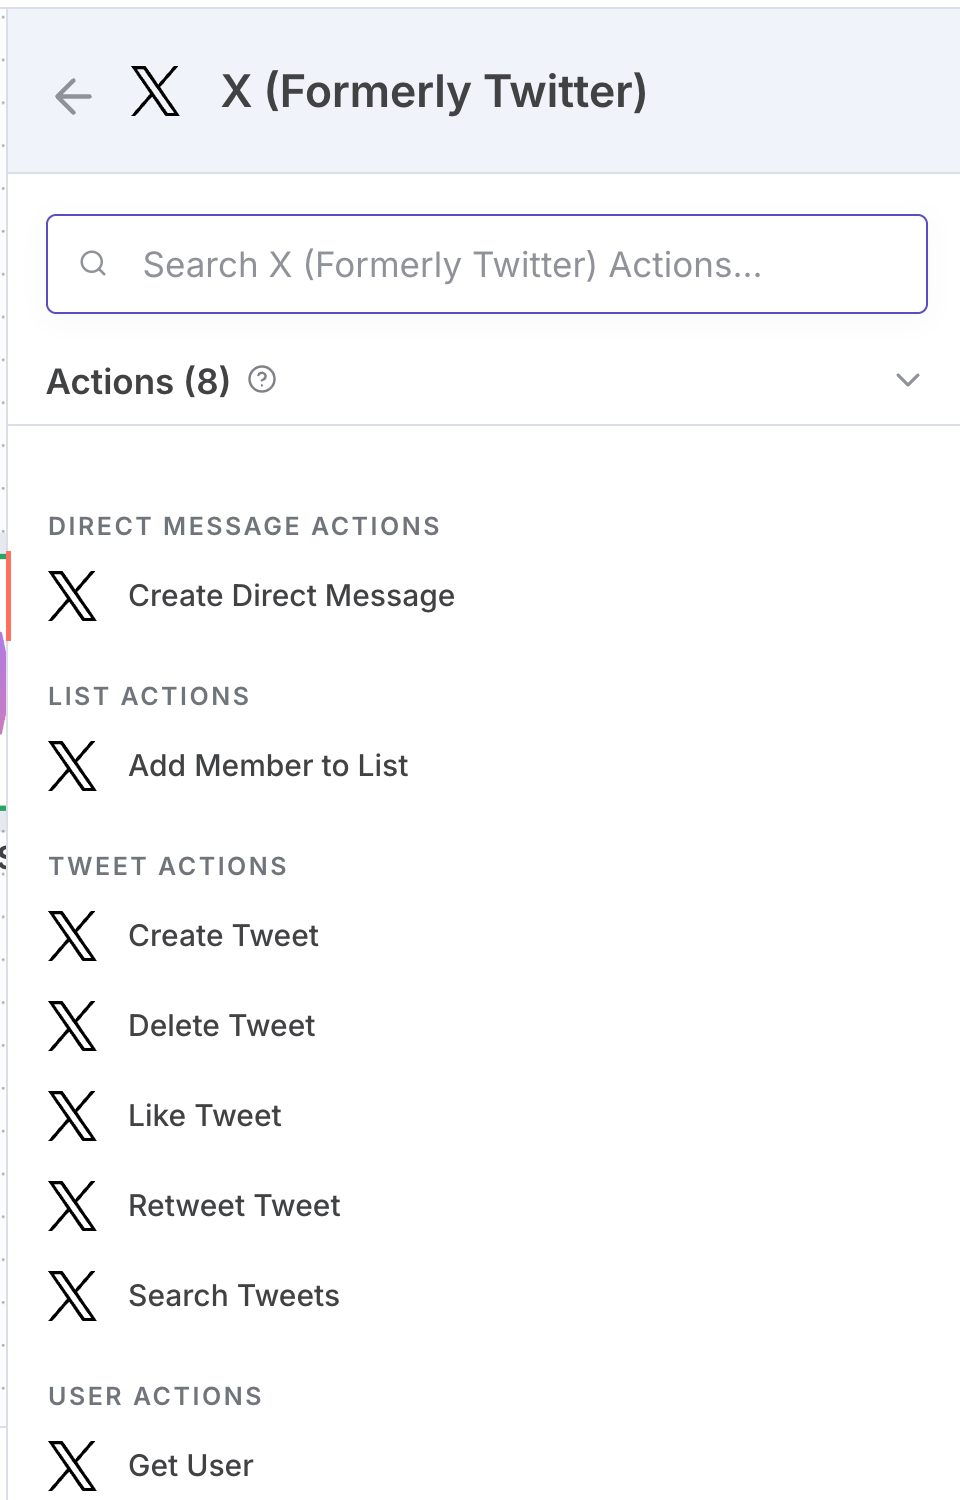
- Select the service of your choice. Here we used X (formerly Twitter) and selected Create Tweet under the actions tab.
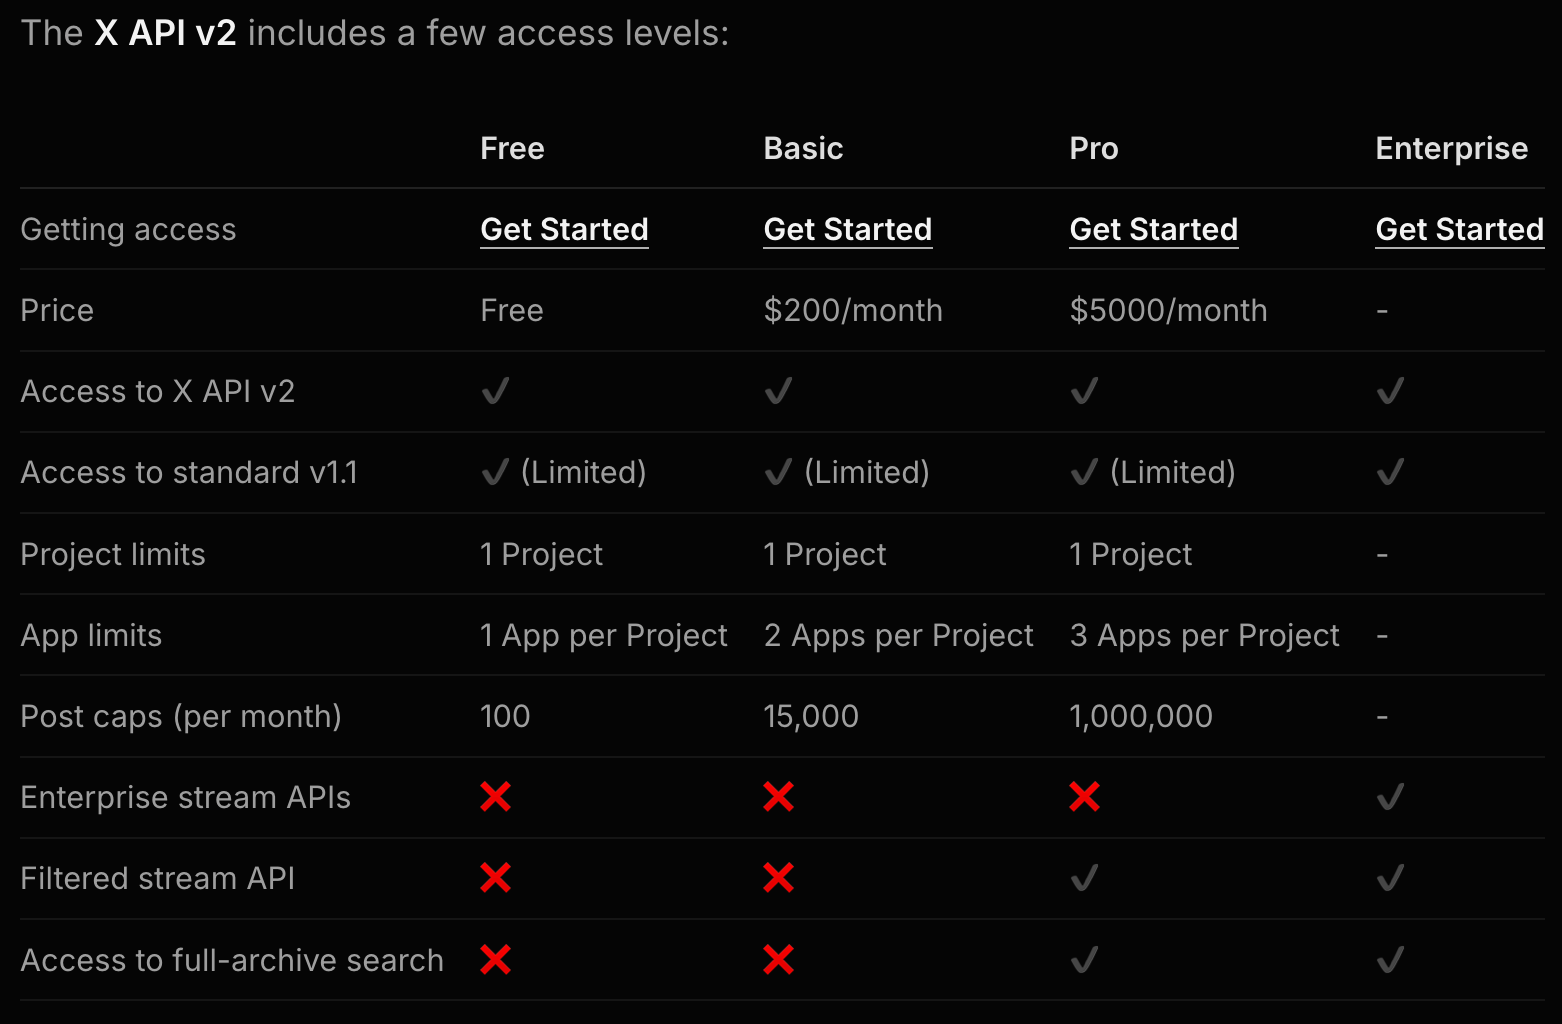
- Connect your Twitter developer account (create one if you don’t have it; you’ll need a Client ID and Secret Key). If you are just testing, feel free to use the free tier access level.
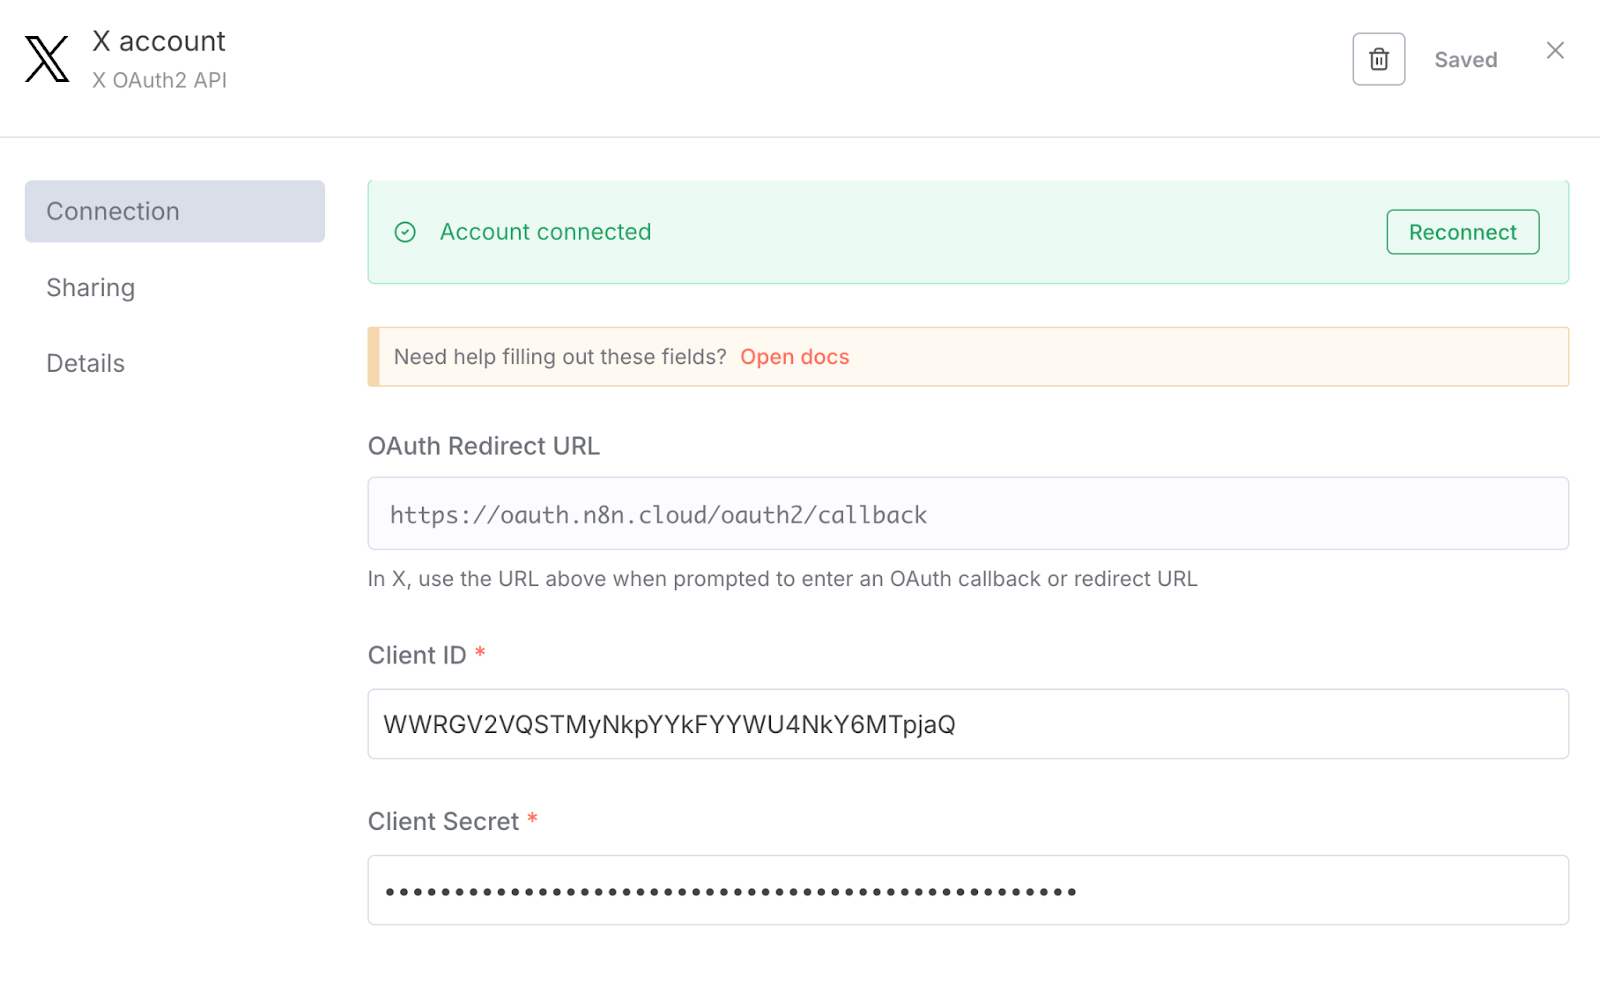
- Follow the steps on the X developer platform to connect n8n to your X account. After completing the steps, you will get a client ID and a Secret Key. Save them and add them to the authentication pop-up on the n8n platform. Then connect to the X account via Google login or sign in using username and password.
- Finally, set the parameters as per your preference along with the following expression in the Text field.
```json
{{$('Get row(s) in sheet').item.json.Content}}
```
The above code pulls the “Content” field from the first row of your Google Sheet to use as the text for your X post.
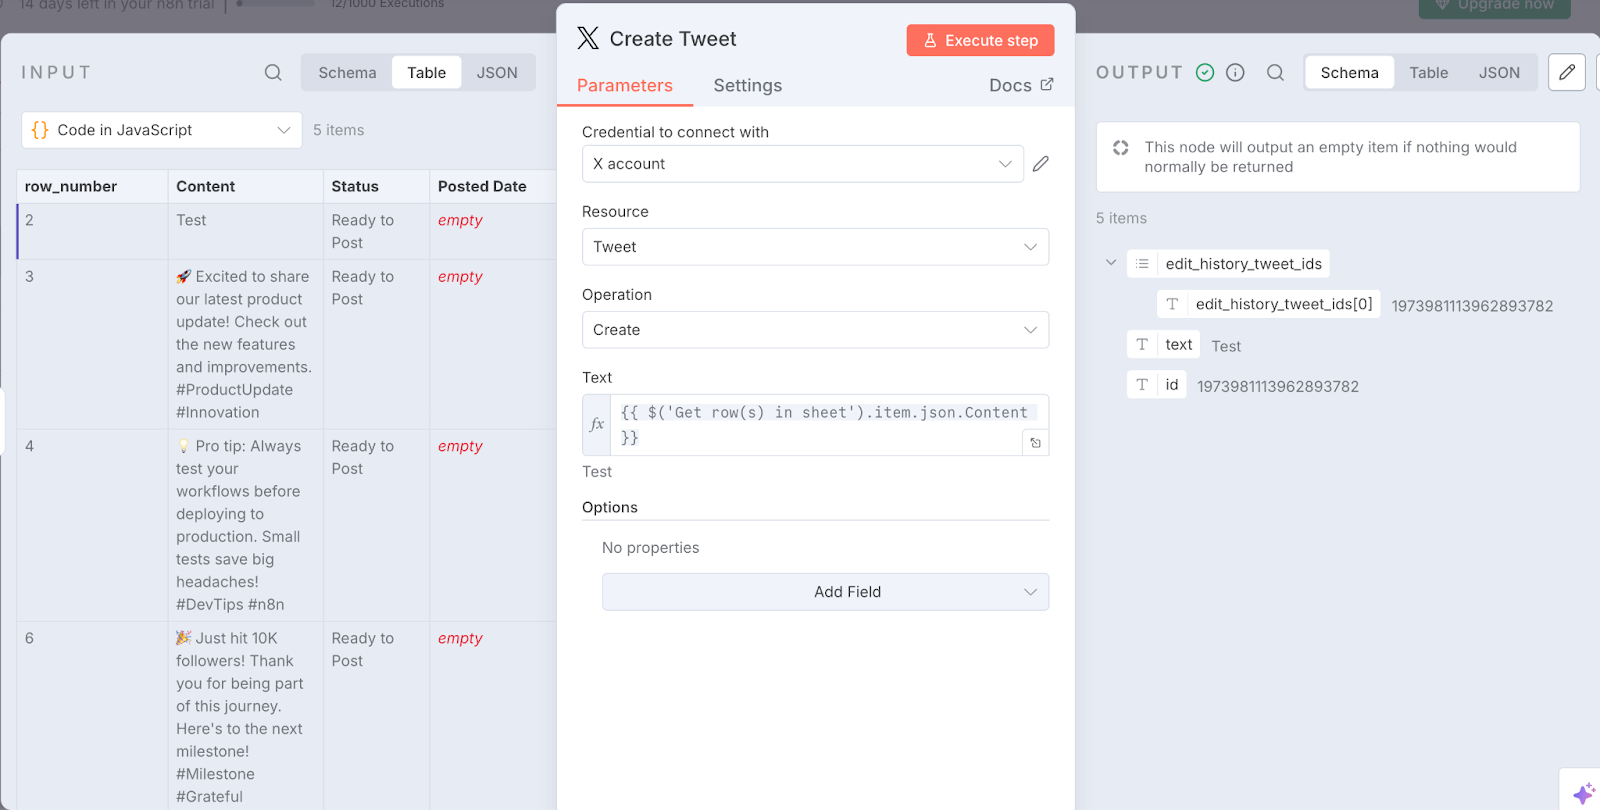
Click the Execute step to test. If everything’s connected correctly, your first automated post should now appear on Twitter.
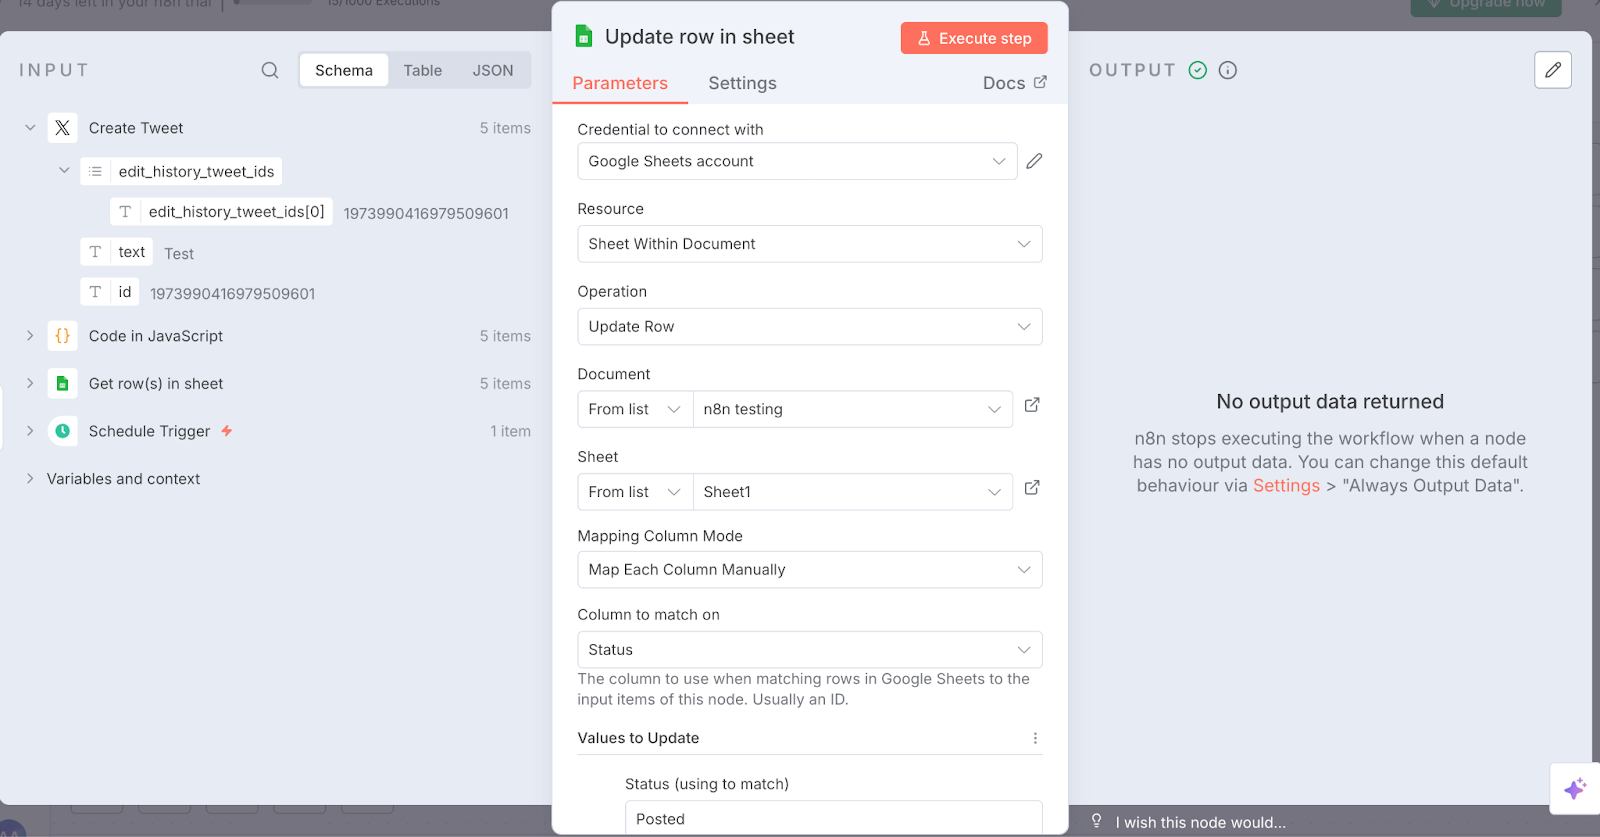
Step 6: Update Your Sheet
To fully automate your posting workflow, you should update your Google Sheet after each tweet. This prevents reposting the same content and gives you a simple record of what’s been published. After a post goes live, we’ll automatically change its status from “Ready to Post” to “Posted”.
Similar to previous steps:
- Add a new node after the Create Tweet step and select the Google Sheets node, and select update row in sheet.
- Connect the same Google account and select the spreadsheet and sheet you used earlier.
- In Mapping Column Mode, choose to Map Each Column Manually and set the column to match on to Status.
- Finally, update the status value under values to update the parameter to “posted” and click Execute step.
With this update step in place, your system can now keep track of what’s been posted.
Step 7: Final Workflow
Now that every piece of the automation is connected, your overall flow would look like this:

Click Execute workflow, and posts will be created on your X account.
Note: Make sure your workflow is active.
Conclusion
Automation is more powerful than ever, but only as reliable as the workflows behind it. In this tutorial, we built a self-updating social media autoposter that schedules posts, pulls them from Google Sheets, publishes to X (Twitter), and marks them as posted. This setup can be easily scaled and extended to other channels like LinkedIn or Instagram, switch from Google Sheets to Notion, or integrate AI to rewrite and optimize your content.
If you want to go deeper, Turing’s AI Literacy course walks you through how to use AI and automation tools in your work. The n8n workflow you just built is a practical example of the kind of automation you’ll create in this course.
Want to become an AI engineer?
Learn the skills that matter on our hands-on Software & AI Engineering programme.